When a patient is wearing glasses in the uploaded photo, manually placing the vertical center line can be tricky. The new Bridge Markers (DBL) feature removes the guesswork by letting you mark the inner edges of the frame bridge. Optogrid will then automatically calculate the exact center between those points, ensuring more accurate dual Pupillary Distance (PD) measurements.
Why use Bridge Markers?
- Eliminates the need to visually guess the nose center line
- Increases accuracy of dual PD measurements when frames are present
- Works automatically with frame-based references
Step-by-step guide
- Click the Frame button
Open the measurement toolbar and select the frame button.

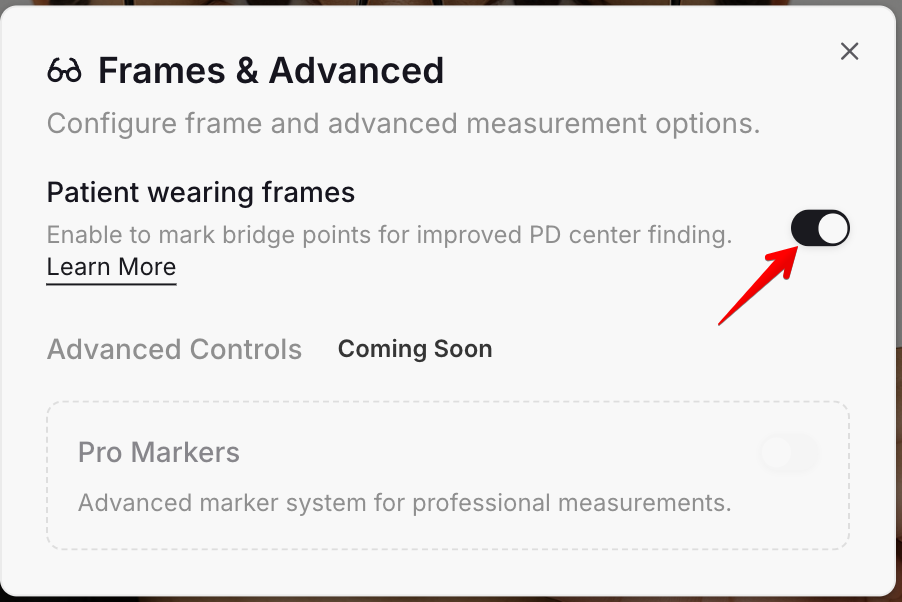
- Enable “Patient wearing frames”
In the dialog, toggle the switch labeled Patient wearing frames and close the dialog.
- Bridge points button appears
The Center button will now change into the Bridge points button.

- Mark the bridge points
On the image, click to mark the two inner edges of the frame bridge (where the lenses meet near the nose).
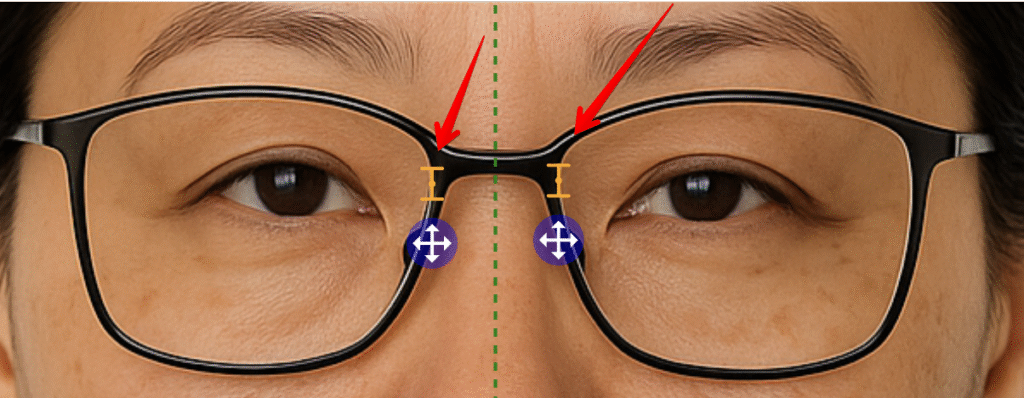
- Automatic center line
Optogrid will automatically position the vertical center line exactly between your two bridge points.
✅ No more guessing. The center is precise and aligned with the actual frame.
Using Bridge Markers with Frame Width Reference
If you select a reference that uses frame width, the Bridge Markers feature will be enabled automatically. This ensures both your reference scale and the vertical center line are derived from the actual frame geometry.

Tips
- Combine this feature with accurate frame width reference to maximize overall measurement reliability.
- Zoom in on the bridge area for more precise placement.
- If needed, reposition the bridge markers by clicking again.

I am a seasoned software engineer with over two decades of experience and a deep-rooted background in the optical industry, thanks to a family business. Driven by a passion for developing impactful software solutions, I pride myself on being a dedicated problem solver who strives to transform challenges into opportunities for innovation.